Bird net with fiberglass rod
Manuals
Bird net with fiberglass rod
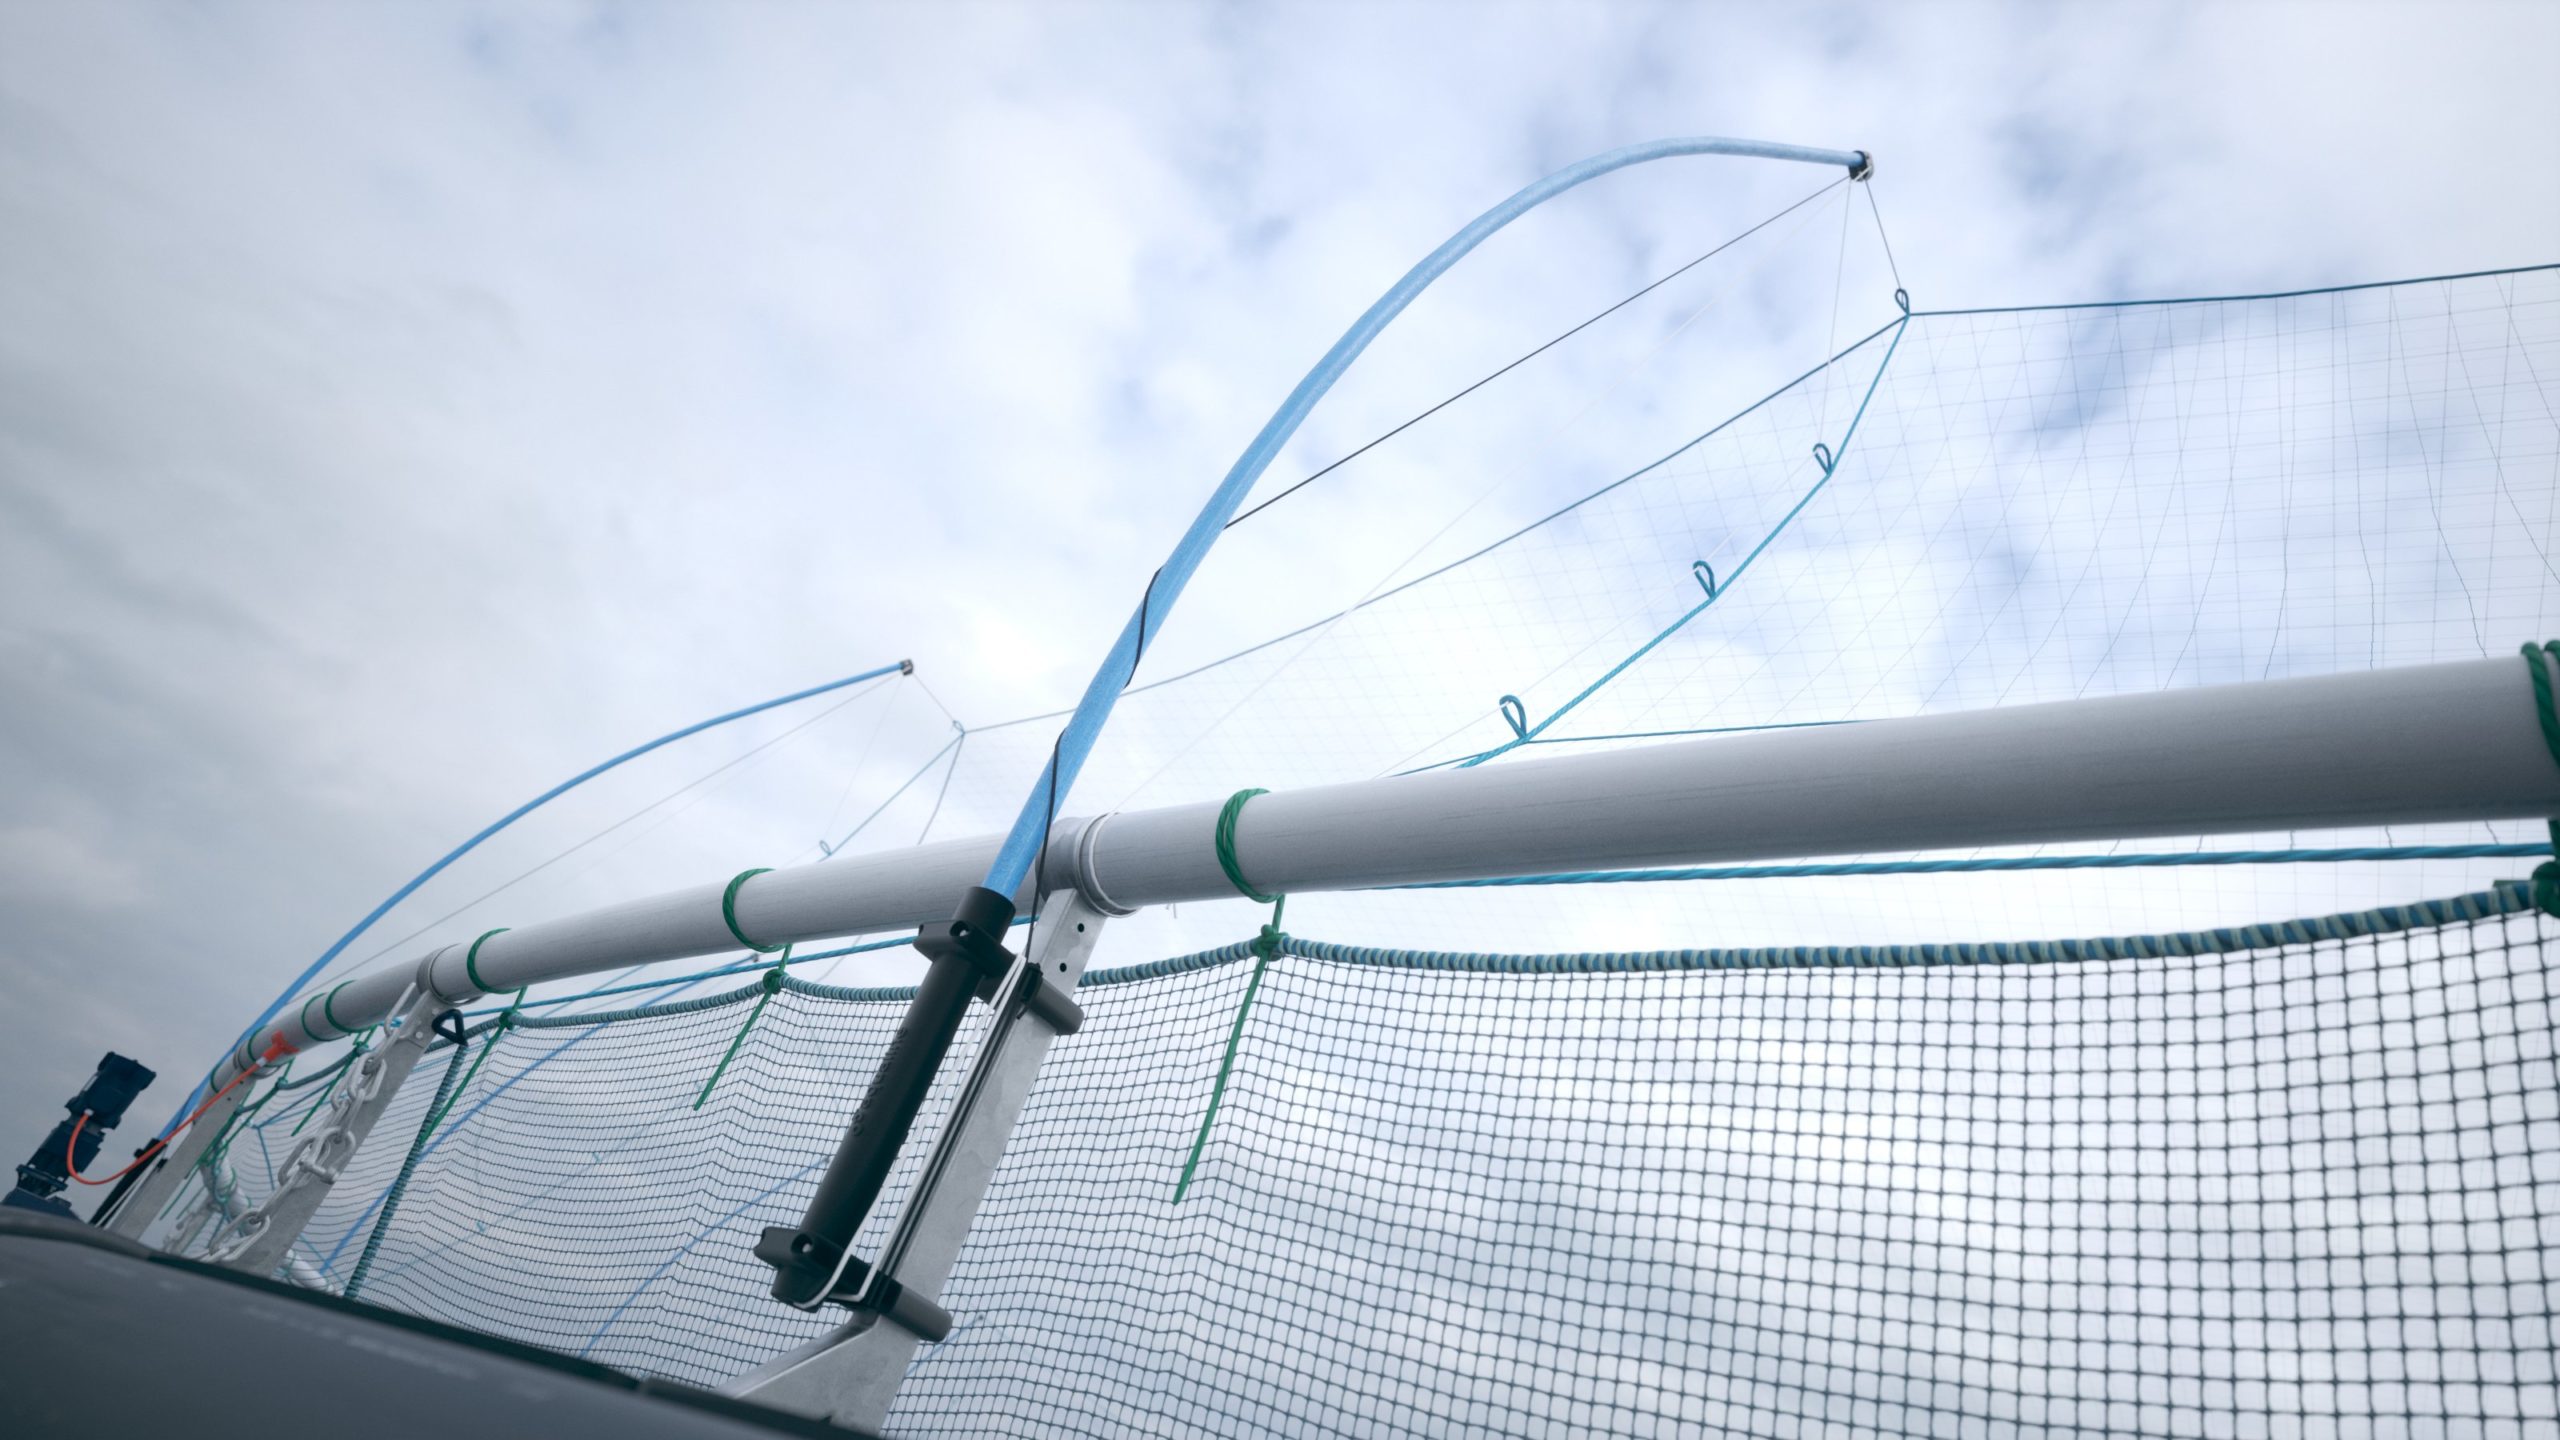
Table of Contents
Important information is marked with the following symbols:

1. Summary with an overview of the component and key points related to escape protection
1.1 General definitions
| Aquaculture farm | Installation for the farming of fish. |
| Basin dimensions | The pen’s inner circumference. |
| Design working life | Assumed period for which a structure or part of it is to be used for its intended purpose with anticipated maintenance but without major repair being necessary. |
| Operation | Fish farming at site, including all installation and operation activities performed at the site while fish farming is in progress, and that are of relevance to the escape of fish. |
| Extra equipment | Equipment that is not a main component. |
| Inspection | Systematic inspection/examination, usually visual, to ensure that the equipment satisfies the requirements. |
| Floater | Structure whose main function is to provide an enclosure with buoancy and/or stiffness. |
| Anchoring system | System of lines and bottom attachments with the main function of keeping the aquaculture farm or raft in position. |
| Bridles | Anchoring line between the floater and the anchoring system. |
| Main component | Part of an aquaculture farm that holds one or more of the installation’s load-bearing main functions. Example: Floater, anchoring system, raft and enclosure. |
| Enclosure | Net or other system of load-bearing parts that form a barrier between the farming volume in a production unit and the surrounding water volume. |
| Clamp | Component keeping the inner and outer floating collars together. |
| Weight | Weight or other device attached to the net to achieve the intended shape. Centre weight is attached beneath the bottom centre of the net. |
| Cage | Floater with enclosure. |
| NS9415:2021 | Standard which sets out functional requirements for floating aquaculture farms and will be fundamental for stakeholders in the aquaculture industry, such as authorities, supervisory bodies, designers, suppliers, actors within R&D and manufacturers, as well as aquaculture farm owners. |
| NYTEK23-regulation | Regulation contributing to prevent escape of fish from floating aquaculture farms. |
| Circumference | Inner length of the inner floating collar. |
| Product certificate | Document confirming that the net is produced in accordance with requirements in NYTEK23 and NS9415:2021. |
| Suspension system | Weight, sinker tube or similar used to keep the three dimensional shape of the net. |
1.2 Introduction
ScaleAQ supplies bird net fiberglass rods that are attached to the pens’s handrail posts:
- Standard length of rods is 5.8m.
- Diameter of rods is 51mm.
- Supplied with a plastic mounting bracket adapted to the pen’s handrail post (steel clamps).
- For pens with plastic clamps it is necessary to use an adapter sleeve/cylinder for fitting the rod to the pen.
- Pulleys and ropes for attaching and positioning the bird net itself.
2. Interface with other components
ScaleAQ bird net rods can be mounted on the following sizes of ScaleAQ FrøyaRingen pens:
- FR400/FRPL400 up to 120 m circumference
- FR450/FRPL450 up to 160 m circumference
- FR500/FRPL500 up to 200 m circumference
- FR500 up to 200 m circumference
- FR630 up to 200 m circumference
Only bird nets adapted to bird net rods and the circumference of the pen should be used.
3. Assembly of the device
3.1 Assembling the mounting bracket and fiberglass rods with ropes on ScaleAQ pen
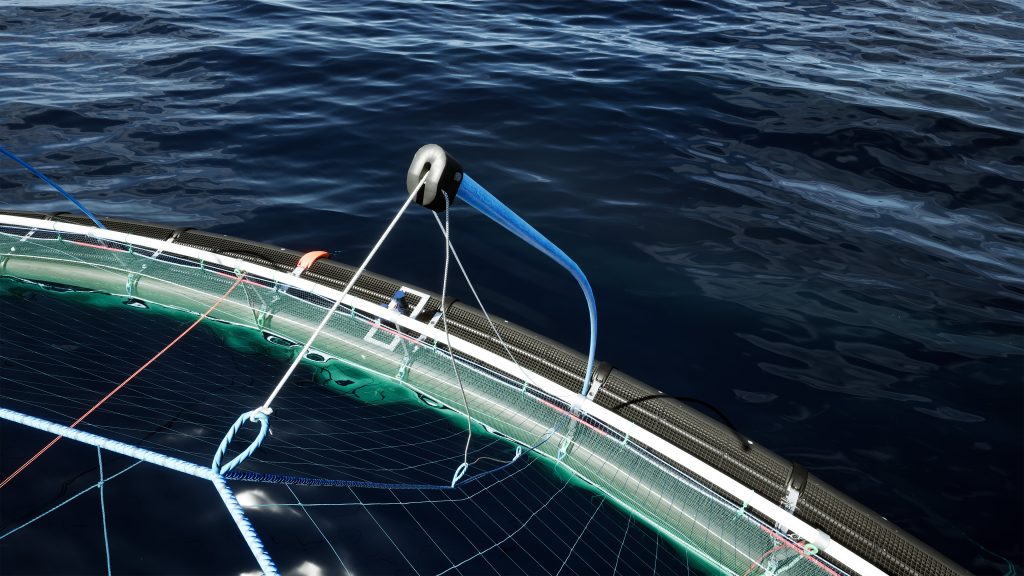
- Make sure that the pulley rope and the lifting rope are attached correctly to the pulley before the rods are fitted to the pen, see Figure 3.1.1-3.1.3.
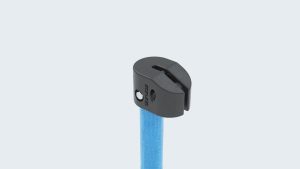
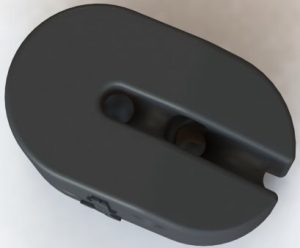
- For pens with steel clamps using mounting brackets for the rods, the pulley rope can run inside the rod, exiting through the center hole in the pulley shown in Figure 3.1.2. This rope is for attaching the top of the bird net and raising it to correct position during installation.
- The rope used for lifting the “curtain” of the bird net when there is need for accessing the fish must run through the outer hole on each side of the pulley shown in Figure 3.1.3.

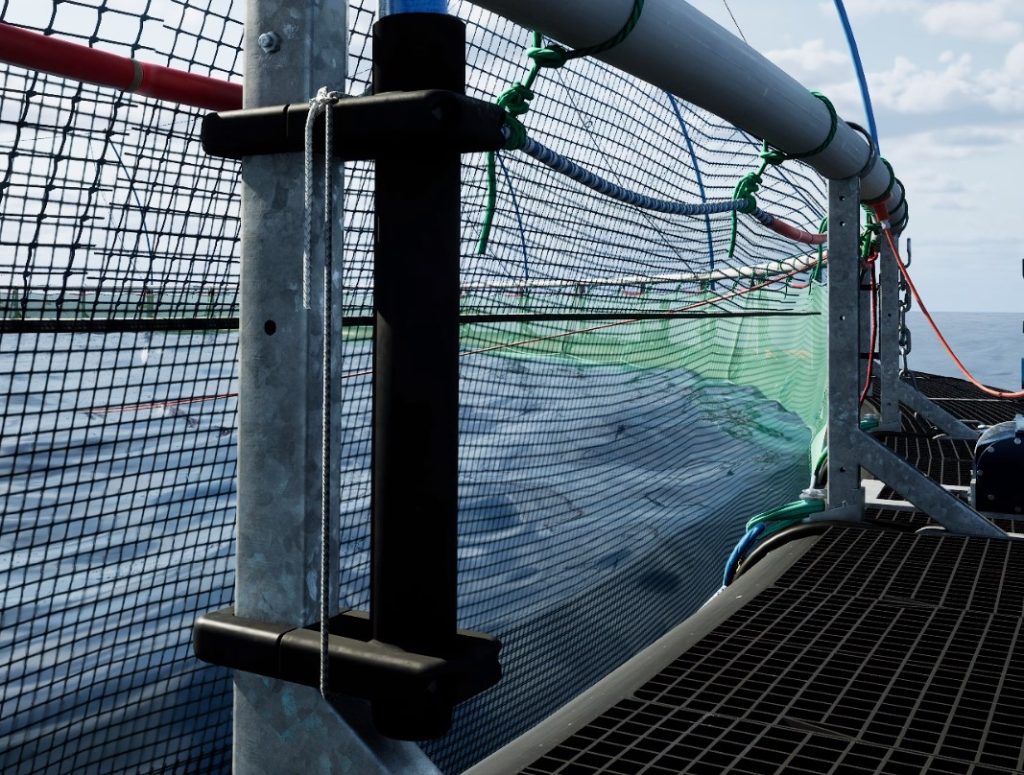
- Attach the mounting brackets to the handrail posts. The handrail posts must not be loaded more than max. specified moment in the pen’s certificate.

3.2 Assembling the rod on ScaleAQ pen with plastic clamps
- The rod is positioned in the hole on the plastic clamp adapted for this specific purpose.
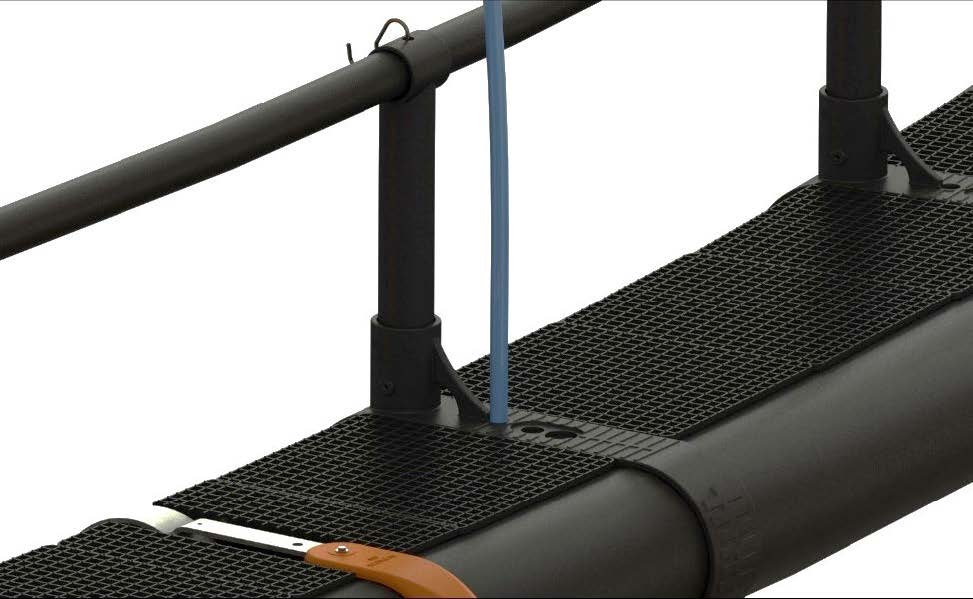
- If the pen has old plastic clamps without the hole suitable for attaching the rod, the plastic clamp can be modified by installing an adapter sleeve/cylinder.
4. Installation on site
4.1 Installing the bird net
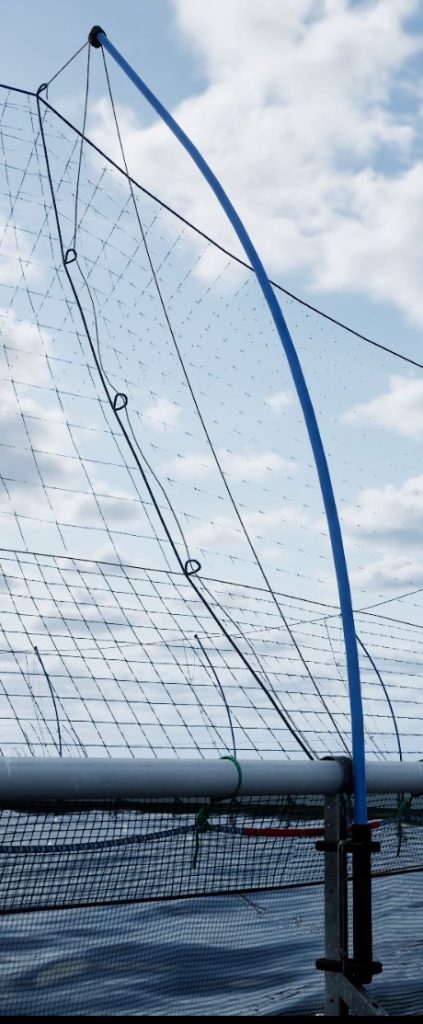
- Attach the pulley rope to the top loop of the bird net, shown in Figure 4.1.1.
- Run one end of the lifting rope exiting the outer pulley hole through the three lower loops of the bird net, shown in Figure 4.1.3.
- Place the rod in the mounting bracket and use the pulley rope to raise the top of the bird net to correct position. Keep the rope tight and secure the end of the rope exiting the bottom of the rod to the mounting bracket shown in Figure 4.1.2. It is also possible to secure the rope to the lower part of the rod holder. If the pulley rope is not running inside the rod, the rope must be lashed around the rod before attaching it to the handrail. This is for reducing movement between the rod tip and the pulley rope which could introduce tearing on the rope.
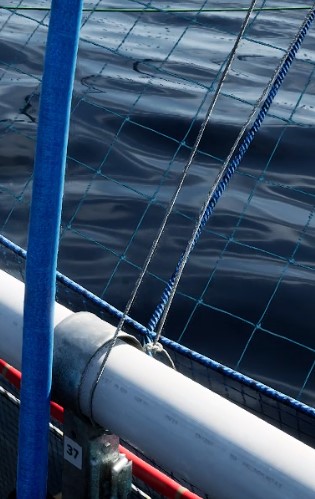
- Attach the ends of the lifting rope to each other as a loop around the handrail and make sure there is some slack in the rope. Attachment method to the handrail is shown in Figure 4.1.4.
- NB: for pens with plastic clamps, the pulley rope can not run inside the rod and must be secured to the handrail.
5. Use

- The bird net rods with mounting bracket are only allowed to be used for the purpose of holding the bird net.
- Never use crane, winch or capstan for bending the rods, tightening the bird net or the ropes.
- Keep a slack in the lifting rope (attached to the lower loops of the net). This is for reducing the risk of tearing on the rope.
- The rods must not get in contact with the net or other components that could introduce a risk of escape. If this happens, immediate measures must be taken.
6. Inspection and maintenance
6.1 Inspection
The person doing the inspection and maintenance must have passed internal courses and studied the ScaleAQ user manual for the bird net rods.
The inspection should be carried out with the intervals listed in Table 6.1.
| No. | Checkpoint | How | Daily | Weekly | Monthly | Every 3 months | Yearly |
|---|---|---|---|---|---|---|---|
| 1 | Rods and mounting brackets | Check that the rods and mounting brackets are intact | X | ||||
| 2 | Attachment of ropes | Check that ropes are intact | X | ||||
| 3 | Attachment of bird net | Visually check that the bird net is intact and all top loops are attached to the pulley rope, especially after bad weather | X |
Before and after periods of challenging weather, inspection must be carried out with a minimum of every week.
6.2 Replacement of components

If replacement of components is necessary, such as the pulley, the glassfiber rod must be removed from the mounting bracket and placed at a suitable area for doing the replacement.
It is not allowed to force the tip of the rod towards the pen when the rod is still placed in the bracket.
If the glassfiber rod is damaged (crack or damage in the surface), the rod must be replaced by a new.
7. Transport and storage
When there is no more use for the bird net on the pen, the rods must be cleaned and inspected for damage. If there is any damage to a rod it must be replaced.
8. Manufacturer and product identification
The mounting bracket and the pulley is marked with ScaleAQ or Aqualine logo.
9. Revision history
| Revision | Change | Date |
|---|---|---|
| 1 | The user manual is revised to meet new requirements in NS 9415:2021. | May 6th 2024 |